 Skip to content
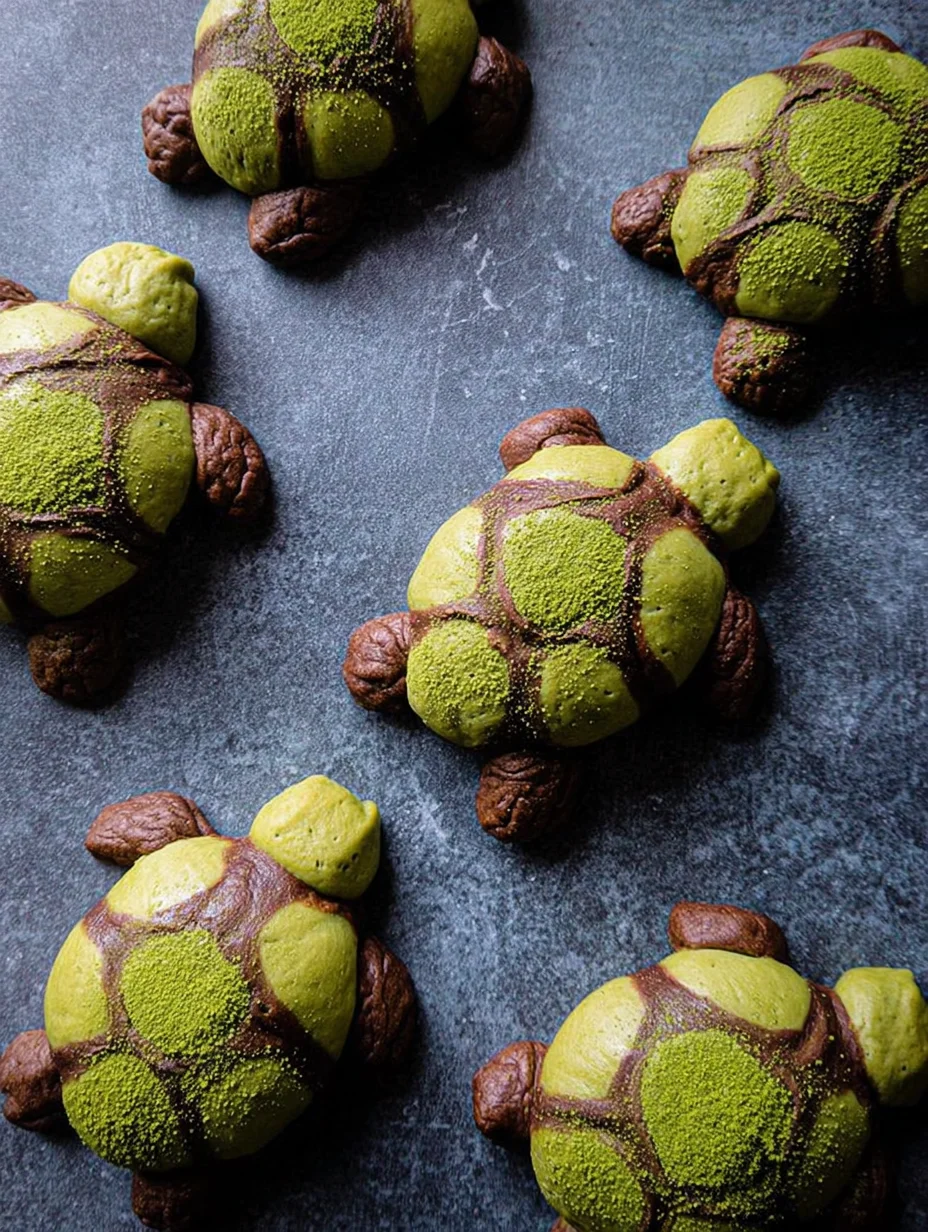
Have you ever imagined biting into a soft, fluffy bread that looks just like adorable little turtles? That’s the magic of Matcha Milk Bread Turtles, a recipe I’ve been perfecting in my kitchen for those special tea-time treats. The vibrant green from the matcha powder mixed with creamy milk bread dough creates these cute critters that are as fun to make as they are to eat. In my experience, kids and adults alike can’t resist their whimsical charm.
What I find interesting is how this fusion of Japanese matcha with classic milk bread brings an earthy sweetness that’s surprisingly addictive. I’ve shared these Matcha Milk Bread Turtles at family gatherings, and they always steal the show. Now, you might be thinking, can I really shape bread like turtles? Absolutely, and I’m excited to guide you through it step by step. Let’s dive into creating your own batch of these delightful Matcha Milk Bread Turtles today!
Key Takeaways:
- Matcha Milk Bread Turtles are a fun, visually appealing twist on traditional bread that’s perfect for parties or snacks.
- Prep and bake in under 3 hours for fresh, warm results without much hassle.
- The subtle matcha flavor paired with sweet milk bread creates a unique, not-too-sweet taste.
- Use high-quality matcha for the best color and flavor in your turtles.
- Store leftovers in an airtight container for up to 2 days to keep them soft.
Why You’ll Adore This Matcha Milk Bread Turtles
Adorable Shape and Presentation: There’s something irresistibly cute about these little turtle breads that makes any table look festive. I’ve noticed how they spark joy and conversation among guests. Plus, shaping them is easier than you think, adding a creative outlet to your baking routine.
Balanced, Earthy Flavor Profile: The matcha brings a gentle bitterness that contrasts beautifully with the richness of the milk bread. It’s not overpowering, allowing the natural sweetness to shine through. In my experience, it’s a refreshing change from overly sugary treats.
Versatile for All Ages: Whether you’re baking for kids who love the fun form or adults seeking a sophisticated snack, these hit the mark. They’re soft and chewy, making them easy to enjoy. Here’s the thing—they pair wonderfully with tea or coffee for any time of day.
Healthier Twist on Indulgence: With antioxidants from matcha and the nourishment of milk bread, you get a treat that feels a bit guilt-free. I always feel good serving something homemade like this. Let’s be honest, who wouldn’t want to impress with such a unique bake?
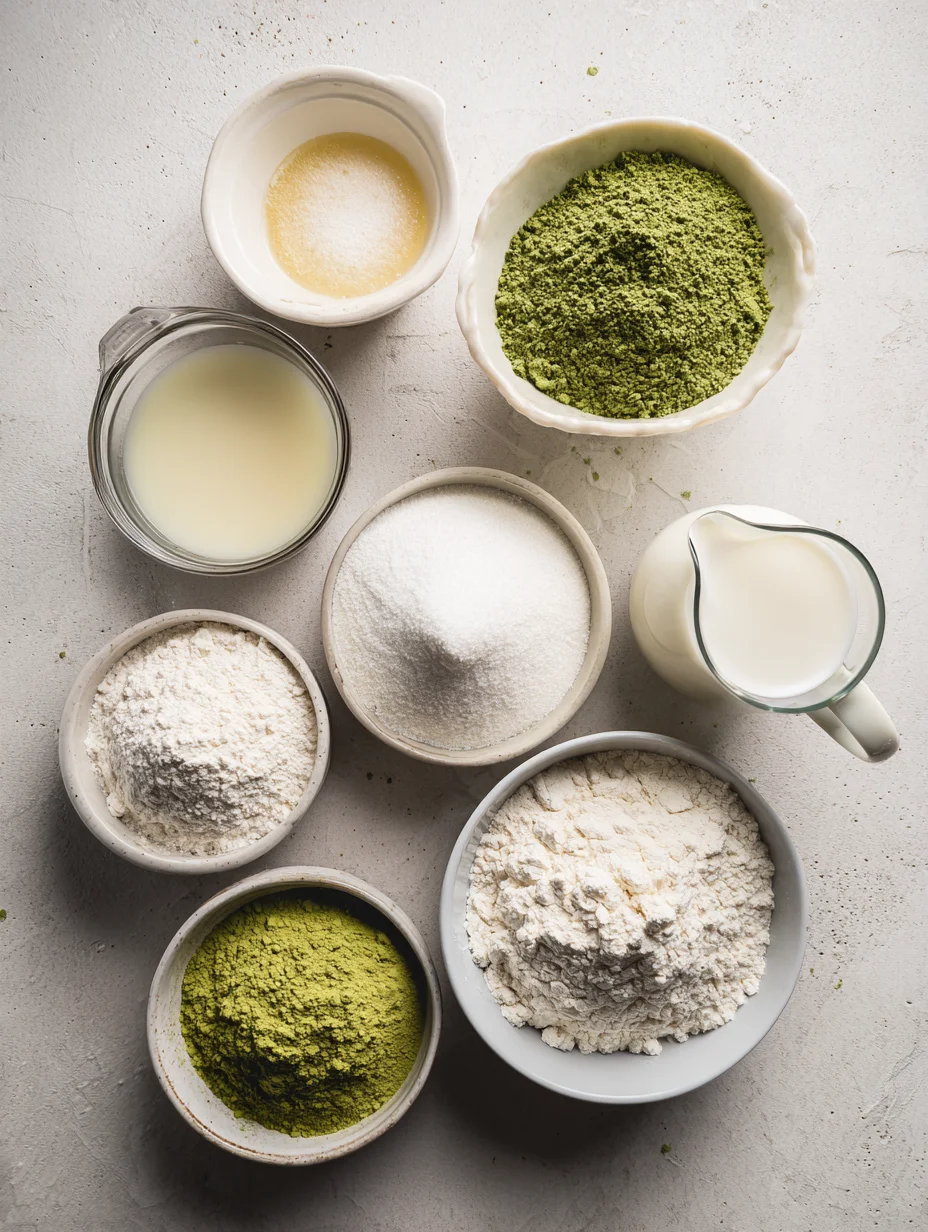
Essential Ingredients for Matcha Milk Bread Turtles
Matcha Powder: This vibrant green superstar gives your Matcha Milk Bread Turtles their signature color and subtle earthy flavor. I recommend using culinary-grade matcha for the best results, as it dissolves smoothly into the dough without bitterness. In my experience, a high-quality one enhances the overall taste, making each bite more enjoyable. It’s the key element that sets these turtles apart from plain bread.
Grab This Kitchen Scale Now — Best Precision Pick!

- Razor-Accurate Every Time: Dual-increment precision down to 0.1g — perfect for baking, meal prep, and portion control with g, oz, ml, and fl'oz modes.
- Smart Removable Bowl Design: Detachable bowl doubles as a protective case for compact storage. Tare function lets you weigh ingredients in any container with zero fuss.
- Built for Everyday Convenience: Auto-zero, tare function, low battery alert, overload indicator, and 2-minute auto-off to extend battery life — all in a sleek stainless steel build.
- ✓ "Perfect for baking — precise, lightweight, and stores easily without wasting counter space"
- ✓ "A game changer! Weighing ingredients is now way more accurate than measuring cups"
- ✓ "Love the 0.1g precision and backlight — best food scale I've owned. Highly recommend!"
⏰ Only a few items left in stock - order soon
Whole Milk: The creamy base that makes the bread so tender and moist. Warm it slightly to activate the yeast, ensuring a fluffy rise. I’ve found that full-fat milk works best for that luxurious texture you crave in milk bread. It also balances the matcha’s intensity perfectly.
Bread Flour: Essential for structure and chewiness in your Matcha Milk Bread Turtles. Its higher protein content helps the dough hold the cute shapes during baking. Opt for unbleached if possible for a natural feel. Without it, the turtles might turn out too dense, so don’t skip this one.
How to Make Matcha Milk Bread Turtles
Prepare the Matcha Milk Dough
Start by warming your milk and dissolving the yeast with a touch of sugar—this activates that magical rise. Whisk in the matcha powder until it’s fully incorporated, giving your dough that beautiful green hue for the Matcha Milk Bread Turtles. In a large bowl, mix the bread flour, remaining sugar, and salt, then add the wet ingredients. Knead for about 10 minutes until smooth and elastic; I’ve learned that a stand mixer makes this less tiring, but by hand works too with some elbow grease.
Shape Your Little Turtles
Once the dough has doubled in size after proofing, punch it down gently and divide into portions for each turtle body. Roll out small pieces for the heads, legs, and tails, attaching them creatively to form the shapes. Place them on a lined baking sheet, and let them proof again while you preheat the oven. The sensory joy of shaping these Matcha Milk Bread Turtles is half the fun—feel the soft dough yield under your fingers.
Bake to Golden Perfection
Bake at 350°F for 15-20 minutes until the tops are lightly golden; watch closely to avoid overbrowning the delicate green. As they cool, the aromas of matcha and fresh bread will fill your kitchen, tempting everyone nearby. For the Matcha Milk Bread Turtles, brush with a milk wash before baking for extra shine. Once done, let them cool slightly before devouring—these are best warm and soft.
Ingredients
- 2 1/4 teaspoons active dry yeast
- 1 cup warm whole milk (about 110°F)
- 1/4 cup granulated sugar, divided
- 2 tablespoons matcha powder
- 3 1/2 cups bread flour
- 1 teaspoon salt
- 1/4 cup unsalted butter, softened
- 1 egg, for egg wash
- Black sesame seeds or chocolate chips for eyes (optional)
Matcha Milk Bread Turtles Instructions
- In a small bowl, combine warm milk, yeast, and 1 tablespoon sugar. Let sit for 5-10 minutes until foamy.
- In a large mixing bowl, sift together bread flour, remaining sugar, salt, and matcha powder.
- Add the yeast mixture and softened butter to the dry ingredients. Knead until a smooth dough forms, about 8-10 minutes.
- Place dough in a greased bowl, cover, and let rise in a warm spot for 1 hour or until doubled.
- Punch down dough, divide into 8-10 equal pieces. Shape each into a turtle: form body, roll small balls for head and four legs, and a tiny tail. Pinch to attach.
- Place shaped turtles on a parchment-lined baking sheet. Cover and proof for 30 minutes.
- Preheat oven to 350°F. Brush turtles with beaten egg for shine. Add eyes if desired.
- Bake for 15-20 minutes until golden. Cool on a wire rack.
Pro Tips for the Best Matcha Milk Bread Turtles
Quality Matcha Matters: Always use fresh, high-grade matcha to avoid a bitter taste in your turtles.
Gentle Kneading: Overworking the dough can make the bread tough, so knead just until smooth.
Proofing Spot: Find a warm, draft-free area for rising to ensure fluffy Matcha Milk Bread Turtles.
You Must Know
- Matcha can clump, so sift it into the flour for even distribution.
- These turtles are best eaten fresh, but freezing dough works for make-ahead prep.
- The milk in the dough adds moisture, preventing dryness during baking.
- Shaping takes practice, but imperfections add charm to your creations.
How to Store Matcha Milk Bread Turtles
Keep your Matcha Milk Bread Turtles in an airtight container at room temperature for up to 2 days to maintain their softness. For longer storage, refrigerate them wrapped in plastic for up to 5 days, though they might firm up a bit. Reheat gently in a 300°F oven for 5 minutes to revive that fresh-baked warmth—I’ve found this keeps the flavors intact without sogginess.
Customizing Your Matcha Milk Bread Turtles
Swap in almond milk for a dairy-free version that still yields tender Matcha Milk Bread Turtles. Add vanilla extract for a sweeter twist, or mix in chocolate chips for a dessert-like variation. If you’re feeling adventurous, try red bean paste inside for an Asian-inspired filling. For gluten-free options, use a 1:1 baking blend, though shaping might need extra care.
What to Serve with Matcha Milk Bread Turtles
Pair these turtles with a hot cup of green tea to complement the matcha notes perfectly. For a light meal, serve alongside fresh fruit salad or a simple cucumber side. They’re also great with butter and jam for breakfast, or dipped in warm chocolate for an indulgent snack. Don’t forget a refreshing iced latte to balance the earthiness.

MATCHA MILK BREAD TURTLES
Adorable turtle-shaped bread rolls infused with matcha and milk for a fun and tasty treat.
Recipe Details
Ingredients
- 01 3 tbsp flour ((24g))
- 02 1/4 cup water ((60ml))
- 03 1/4 cup milk ((60ml))
- 04 270 g bread flour ((we use King Arthur Organic))
- 05 100 g sugar
- 06 12 g matcha ((we use Encha))
- 07 5 g instant yeast ((we use Saf Instant Gold))
- 08 4 g fine grain salt
- 09 4 g non-fat dry milk powder ((we use Now Foods Organic))
- 10 70 g whole milk (, room temperature)
- 11 1 tsp vanilla extract ((4g))
- 12 1 egg (, room temperature & whisked)
- 13 28 g unsalted butter (, melted & cooled)
- 14 90 g white chocolate (, finely chopped)
- 15 12 black sesame seeds
- 16 1 1/2 tsp active dry yeast ((3g))
- 17 1/4 cup warm water ((60ml))
- 18 1 tbsp sugar ((12g))
- 19 1 1/2 tsp vegetable oil ((12.5g) (we used avocado oil))
- 20 1/2 tsp salt ((2g))
- 21 1/3 cup rice flour ((50g) (use white or brown rice flour- not Mochiko sticky rice flour))
- 22 1 tbsp cocoa powder ((7.5g))
- 23 sugar (for sprinkling)
FILED UNDER:
NUTRITION FACTS (PER SERVING)
Nutrition information is calculated using an ingredient database and should be considered an estimate. In cases where multiple ingredient alternatives are given, the first listed is calculated for nutrition. Garnishes and optional ingredients are not included.
Frequently Asked Questions About Matcha Milk Bread Turtles
Can I make Matcha Milk Bread Turtles ahead of time?
Yes, you can prepare the dough and shape the turtles a day ahead, then refrigerate overnight before the final proof and bake. This method actually enhances the flavor as the dough develops. Just allow extra time for proofing at room temperature in the morning.
How long does Matcha Milk Bread Turtles last in the fridge?
Your baked Matcha Milk Bread Turtles will stay fresh in the fridge for up to 5 days when stored properly in an airtight container. They might lose some softness, so toasting briefly revives them. Freezing is better for longer storage, up to a month.
Is matcha powder necessary for the green color in these turtles?
Absolutely, matcha is what gives the Matcha Milk Bread Turtles their iconic green shade and flavor. If you skip it, you’ll have plain milk bread, which is delicious but misses the fun element. Food coloring is an option, but it won’t add the taste.
Can beginners make these?
Yes, even if you’re new to bread baking, the steps for Matcha Milk Bread Turtles are straightforward with clear timings. Start with a stand mixer for kneading if possible. Practice shaping on a small batch first for confidence.
What if my dough doesn’t rise?
Check that your yeast is fresh and the milk isn’t too hot, as that can kill it. A warm proofing spot helps too. If issues persist, try a quick dough test by seeing if it bubbles—adjust as needed next time.
How do I get the turtle shapes to stay intact?
Pinch the attachments firmly and let them proof without crowding on the sheet for your Matcha Milk Bread Turtles. Baking on parchment prevents sticking too. If they spread, your dough might be too warm—chill briefly before shaping.
Are these suitable for vegans?
Not in the base recipe due to milk and butter, but you can veganize them with plant-based alternatives. Use oat milk and vegan butter for similar results. The Matcha Milk Bread Turtles will still be cute and tasty.
Can I add fillings to the turtles?
Sure, incorporate sweet fillings like custard or nuts before sealing the shapes. Just don’t overfill to avoid bursting during baking. This elevates your Matcha Milk Bread Turtles into gourmet territory.
Final Thoughts
From the first proof to the last bite, making Matcha Milk Bread Turtles has brought so much joy to my baking adventures. These little green wonders combine creativity with comforting flavors that linger. I encourage you to roll up your sleeves and try this recipe—your kitchen will thank you, and so will everyone who tastes them. Share your creations in the comments below!