 Skip to content
Every holiday season, I find myself reaching for the familiar blue tin of Danish Butter Cookies, those delicate, buttery treats that just scream celebration. There’s something magical about their crisp texture and rich flavor that transports me back to cozy family gatherings. If you’ve ever wondered how to recreate these homemade Danish Butter Cookies at home, you’re in for a treat—I’ve perfected a recipe that’s simple yet yields bakery-quality results.
In my experience, making Danish Butter Cookies doesn’t require fancy equipment, just good ingredients and a bit of patience. What I love most is how versatile they are; whether you’re baking for gifting or snacking, these cookies never disappoint. Let’s dive into this easy Danish Butter Cookies recipe and bring a touch of Danish charm to your kitchen today!
Key Takeaways:
- These Danish Butter Cookies are incredibly easy to make with just a handful of pantry staples.
- Prep and bake in under an hour for fresh, warm cookies without the hassle.
- Expect a melt-in-your-mouth buttery flavor that’s perfect for any occasion.
- Chill the dough for even better shape and texture in your Danish Butter Cookies.
- Store in an airtight container for up to two weeks to keep them fresh.
Why You’ll Adore This Danish Butter Cookies
Buttery Bliss in Every Bite: There’s nothing quite like the rich, indulgent taste of these Danish Butter Cookies straight from the oven. The high-quality butter creates that signature melt-in-your-mouth texture we all crave. I’ve made them countless times, and they always steal the show at parties.
Simple Yet Elegant: You don’t need to be a pro baker to whip up these beauties—it’s all about the straightforward steps that anyone can follow. In my kitchen, they’ve become a go-to for effortless entertaining. Plus, their classic look adds a touch of sophistication without extra effort.
Versatile for Any Celebration: Whether it’s Christmas or a casual tea time, these homemade Danish Butter Cookies fit right in. Their subtle sweetness pairs beautifully with so many things, making them a crowd-pleaser every time. Let’s be honest, who can resist that golden, crisp perfection?
Healthier Homemade Twist: By controlling the ingredients, you can enjoy these Danish Butter Cookies guilt-free compared to store-bought versions. I always feel good serving them to family, knowing they’re made with love and real butter. It’s a small change that makes a big difference in flavor and freshness.
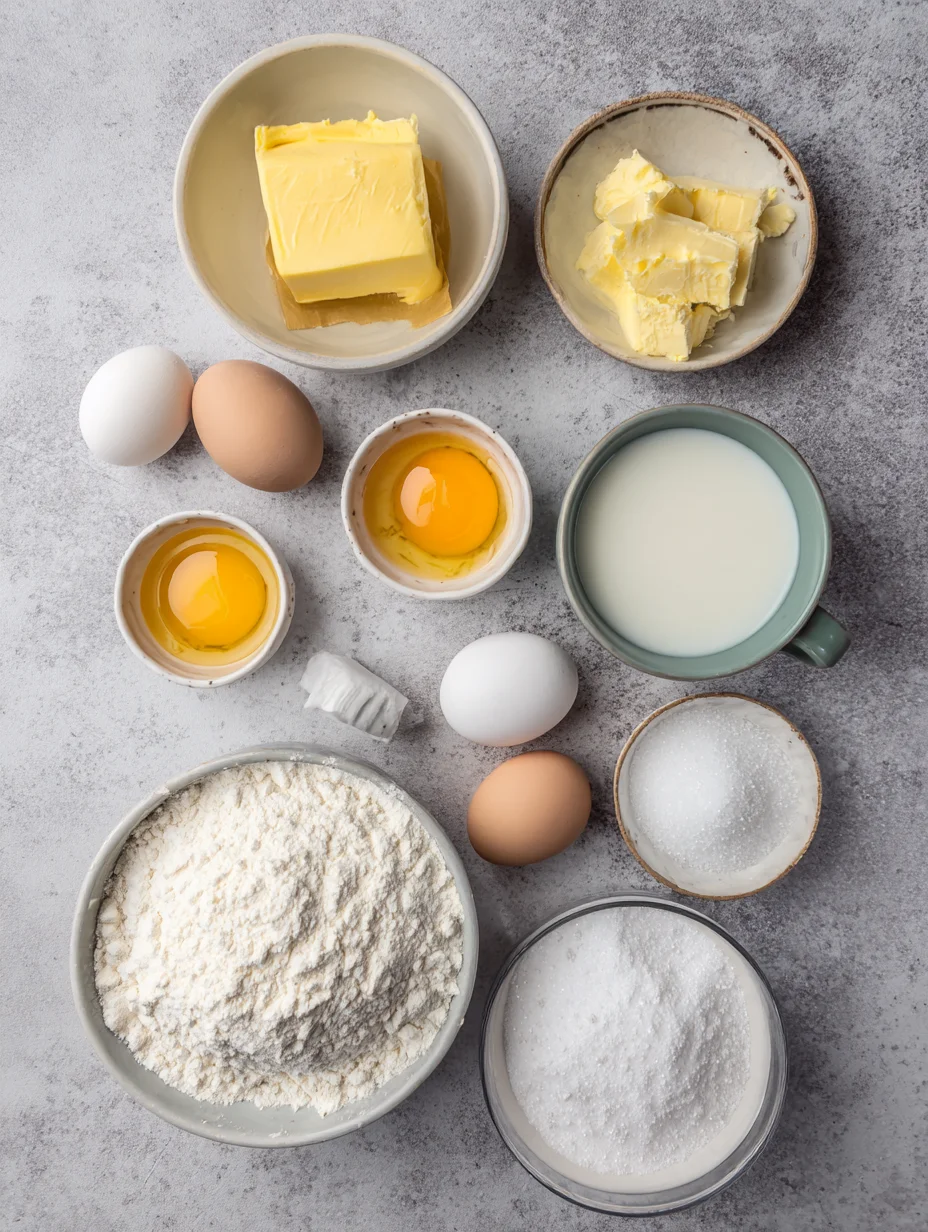
Essential Ingredients for Danish Butter Cookies
Unsalted Butter: The star of these Danish Butter Cookies, high-quality unsalted butter provides the creamy base and rich flavor. Softened to room temperature, it creams beautifully with sugar for that light, airy texture. In my experience, using European-style butter elevates the taste even more, giving an authentic Danish touch. Without it, your cookies just won’t have that signature melt-in-your-mouth quality.
Grab This Kitchen Scale Now — Best Precision Pick!

- Razor-Accurate Every Time: Dual-increment precision down to 0.1g — perfect for baking, meal prep, and portion control with g, oz, ml, and fl'oz modes.
- Smart Removable Bowl Design: Detachable bowl doubles as a protective case for compact storage. Tare function lets you weigh ingredients in any container with zero fuss.
- Built for Everyday Convenience: Auto-zero, tare function, low battery alert, overload indicator, and 2-minute auto-off to extend battery life — all in a sleek stainless steel build.
- ✓ "Perfect for baking — precise, lightweight, and stores easily without wasting counter space"
- ✓ "A game changer! Weighing ingredients is now way more accurate than measuring cups"
- ✓ "Love the 0.1g precision and backlight — best food scale I've owned. Highly recommend!"
⏰ Only a few items left in stock - order soon
Powdered Sugar: This fine sugar dissolves easily, ensuring a smooth dough without graininess in your Danish Butter Cookies. It adds just the right amount of sweetness without overpowering the butter. I prefer it over granulated sugar because it helps achieve the delicate crispness we love. Always sift it to avoid lumps for perfect results.
All-Purpose Flour: The backbone of the dough, all-purpose flour gives structure to these Danish Butter Cookies while keeping them tender. Combined with a pinch of salt, it balances the richness perfectly. In my baking trials, sifting the flour ensures even mixing and prevents dense cookies. It’s a simple step that makes a world of difference in texture.
How to Make Danish Butter Cookies
Prepare the Dough
Start by beating the softened butter and powdered sugar together until creamy and light—this usually takes about 2-3 minutes with an electric mixer. Add the vanilla extract for that subtle aromatic note that enhances the Danish Butter Cookies’ flavor. Gradually mix in the flour and salt until a soft dough forms; don’t overmix to keep it tender. In my experience, if the dough feels too sticky, chill it briefly before proceeding. This step sets the foundation for cookies that are crisp outside and buttery inside. Wrap the dough in plastic and refrigerate for 30 minutes to firm up.
Shape and Bake
Preheat your oven to 350°F and line baking sheets with parchment paper for easy release. Using a cookie press or piping bag, shape the chilled dough into small wreaths, stars, or rounds—the choice is yours for fun Danish Butter Cookies variations. Space them about 2 inches apart as they spread slightly. Bake for 10-12 minutes until the edges turn a pale golden color; watch closely to avoid overbrowning. The scent of baking butter will fill your kitchen, making it hard to wait. Cool on the sheet for a few minutes before transferring to a wire rack.
Finish and Cool
Once out of the oven, let your Danish Butter Cookies cool completely to achieve that perfect snap. If desired, dip one end in melted chocolate for an extra indulgent touch—we often do this for holidays. Store them promptly to maintain crispness, as humidity can soften them quickly. I’ve found that cooling fully prevents breakage when handling. These cookies taste even better the next day as flavors meld. Enjoy the satisfaction of homemade perfection!
Ingredients
- 1 cup (2 sticks) unsalted butter, softened
- 1/2 cup powdered sugar
- 1 teaspoon vanilla extract
- 2 cups all-purpose flour
- 1/4 teaspoon salt
- Optional: 1/2 cup melted dark chocolate for dipping
Danish Butter Cookies Instructions
- Preheat oven to 350°F (175°C). Line two baking sheets with parchment paper.
- In a large bowl, cream together softened butter and powdered sugar until light and fluffy, about 2 minutes.
- Beat in vanilla extract until combined.
- Gradually add flour and salt, mixing until a soft dough forms. Do not overmix.
- Chill dough in the fridge for 30 minutes.
- Using a cookie press or piping bag, pipe dough into shapes on prepared sheets, spacing 2 inches apart.
- Bake for 10-12 minutes until edges are lightly golden. Cool on sheets for 5 minutes, then transfer to wire racks.
- Optional: Dip cooled cookies in melted chocolate and let set.
- Store in an airtight container.
Pro Tips for the Best Danish Butter Cookies
Room Temperature Butter: Always use butter that’s softened but not melted for the creamiest Danish Butter Cookies dough.
Don’t Skip Chilling: Refrigerate the dough to help it hold shape during piping and baking.
Parchment Paper Is Key: It prevents sticking and ensures evenly baked Danish Butter Cookies every time.You Must Know
- Danish Butter Cookies traditionally use high-fat butter for authenticity and superior flavor.
- These cookies are naturally gluten-free adaptable with a 1:1 flour substitute.
- Baking time varies by oven; check at 10 minutes to avoid overbaking.
- They freeze well unbaked—shape and freeze dough for up to 3 months.
How to Store Danish Butter Cookies
To keep your Danish Butter Cookies fresh and crisp, store them in an airtight container at room temperature for up to two weeks. If you live in a humid area, consider adding a silica packet to absorb moisture. For longer storage, freeze them in a single layer first, then transfer to a freezer bag—they’ll last up to three months without losing quality. No need to thaw fully; just let them come to room temp for the best texture.
Customizing Your Danish Butter Cookies
Feel free to add a teaspoon of almond extract for a nutty twist on these Danish Butter Cookies, or mix in finely chopped nuts like pecans for texture. If you’re watching sugar, try swapping half the powdered sugar with a natural sweetener, though it may alter the classic crispness slightly. For a chocolate version, incorporate cocoa powder into the dough—it’s delicious and reminiscent of holiday treats. Always test a small batch first to nail your perfect Danish Butter Cookies variation.
What to Serve with Danish Butter Cookies
These Danish Butter Cookies shine alongside a hot cup of coffee or tea, creating the ultimate afternoon pick-me-up. Pair them with fresh fruit like berries or sliced apples for a light contrast to their richness. For a dessert spread, serve with vanilla ice cream or whipped cream. During holidays, add them to a charcuterie board with cheeses and nuts for unexpected delight.

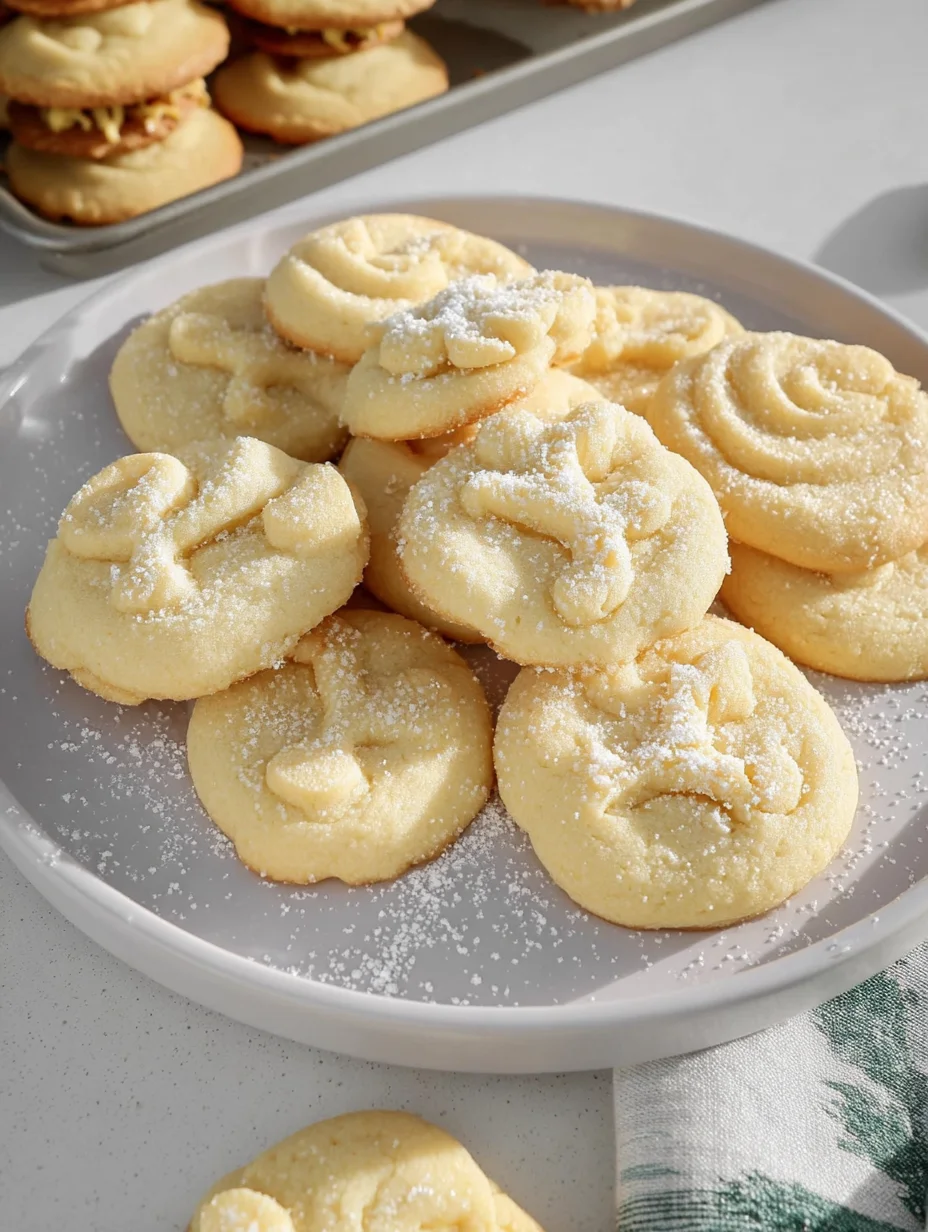
Danish Butter Cookies (Melt in your mouth)
These melt-in-your-mouth Danish butter cookies are synonymous with nostalgia and the holiday season. These simple and delicious butter cookies are perfect for gifting this year!
Timing
Recipe Details
Ingredients
- 01 1 cup European salted butter ((227 g) (room temperature))
- 02 1/2 cup granulated sugar ((100 g))
- 03 1/8 teaspoon salt
- 04 2 egg yolks
- 05 2 teaspoons vanilla extract ((10 g))
- 06 1 tablespoon whole milk ((15 g) (or more to soften))
- 07 2 cups all-purpose flour ((220 g))
- 08 1/2 cup cake flour ((50 g))
- 09 coarse sugar ((for decorating))
Instructions
Make space in the refrigerator and prep the baking mats. Make room in your refrigerator for a baking sheet so the shaped cookies can chill for 20-30 minutes. Without chilling, the piped cookies may over-spread. Line two baking sheets with parchment paper or a silicone baking mat. Set aside.
Cream butter, sugar salt. In the bowl of a stand mixer fitted with a paddle attachment, cream butter on medium speed until smooth. With the mixer still running on low, slowly add in sugar and salt. Mix on medium speed until light and fluffy.
Incorporate egg yolks, vanilla, and milk. While mixing, add egg yolks, vanilla, and milk. Continue to mix on medium speed until well combined. Scrape down the sides of the bowl for thorough mixing.
Mix dry ingredients and add into mixture. In a medium-sized mixing bowl, whisk the flour, and cake flour. Add flour mixture to mixer in two additions, and scrape down the sides of the bowl. Mix on low speed until combined and no traces of flour. If the batter is too thick to pipe, add another tablespoon of milk to soften.
Pipe the cookies. Transfer cookie batter to a large piping bag with fitted a ½-inch open star tip. Pipe 2-inch cookies (rosettes, pretzels, circles, squares) on a prepared baking sheet. Space cookies at least 2-inches apart. If desired, sprinkle the dough with festive sprinkles and/or coarse sugar. Chill in the refrigerator for 20-30 minutes.
Prepare the oven. Preheat oven to 350°F. Make sure the baking rack is in the middle of the oven.
Bake. Bake for 10-15 minutes or until the edges are JUST lightly golden brown. Let cookies cool on the baking sheet for about 5 minutes before transferring to a wire rack to cool to room temperature.
FILED UNDER:
NUTRITION FACTS (PER SERVING)
Nutrition information is calculated using an ingredient database and should be considered an estimate. In cases where multiple ingredient alternatives are given, the first listed is calculated for nutrition. Garnishes and optional ingredients are not included.
Frequently Asked Questions About Danish Butter Cookies
Can I make Danish Butter Cookies ahead of time?
Absolutely, you can prepare the dough up to two days in advance and store it chilled. Bake just before serving for the freshest taste. This makes them ideal for busy holiday prep.
How long does Danish Butter Cookies last in the fridge?
Your Danish Butter Cookies will stay fresh in the fridge for up to a week in an airtight container. However, they might soften slightly due to moisture, so room temperature is preferable. Revive crispness by warming briefly in a low oven if needed.
Are Danish Butter Cookies gluten-free?
Traditional recipes aren’t, but you can easily swap in a gluten-free flour blend. I’ve tried it successfully with no texture loss. Just ensure all ingredients are certified gluten-free.
Can I freeze Danish Butter Cookies?
Yes, freeze baked Danish Butter Cookies in a single layer on a tray, then transfer to a bag for up to three months. Thaw at room temperature—they taste almost as good as fresh. For more on freezing baked goods, check out our best gingerbread cookies recipe.
What’s the best way to pipe the dough for Danish Butter Cookies?
Use a sturdy piping bag with a star tip for classic shapes. If the dough is too soft, chill it longer. Practice on parchment first to get the hang of it.
Why are my Danish Butter Cookies spreading too much?
This usually happens if the butter is too warm or the dough isn’t chilled enough. Always start with room-temp butter and refrigerate the shaped cookies for 10 minutes before baking. Patience pays off for perfect Danish Butter Cookies.
Can I add flavors to Danish Butter Cookies?
Definitely—try lemon zest or cardamom for a twist. These additions keep the buttery essence while adding interest. Experiment sparingly to maintain balance.
How do I achieve the crisp texture in Danish Butter Cookies?
Bake until edges are golden and cool completely on a rack. Avoid stacking while warm to prevent steaming. For extra crispness, store with a slice of bread in the container.
Final Thoughts
There’s truly nothing like the joy of fresh-baked Danish Butter Cookies filling your home with warmth and aroma. This recipe has become a staple in my baking repertoire, and I know it’ll become yours too. Gather your ingredients and give these Danish Butter Cookies a try today—you won’t regret it! Share your results or tag us in your creations; we’d love to see them.