 Skip to content
There’s nothing quite like the warm, gooey aroma of Homemade Cinnamon Rolls baking in the oven on a lazy weekend morning. I remember the first time I attempted to make Homemade Cinnamon Rolls from scratch—it was a bit intimidating, but the result was so rewarding, with that perfect swirl of cinnamon and sugar wrapped in soft dough. If you’ve ever bought those store-bought ones and wished for something fresher and more flavorful, you’re in for a treat. These Homemade Cinnamon Rolls are my go-to for brunch gatherings or just a cozy family breakfast, and I can’t wait to share how easy it really is to whip them up.
In my experience, the key to amazing Homemade Cinnamon Rolls lies in patience during the rising stages, but don’t worry—I’ll walk you through every step so you feel confident from the start. What I love most is how versatile they are; you can add nuts or raisins if you like, but even plain, they’re irresistible. Let’s dive into this recipe and get your kitchen smelling like heaven today.
Key Takeaways:
- Homemade Cinnamon Rolls offer a fresh, gooey texture that’s far superior to store-bought versions.
- Prep time is about 30 minutes, with rising taking 2 hours total for convenience on busy days.
- The combination of cinnamon filling and cream cheese icing creates an unbeatable sweet, spicy flavor profile.
- Use active dry yeast and warm milk for foolproof rising every time.
- Store leftovers in an airtight container for up to 3 days, or freeze for longer enjoyment.
Why You’ll Adore This Homemade Cinnamon Rolls
Ultimate Comfort Food: These Homemade Cinnamon Rolls wrap you in warmth like a hug from an old friend. The soft, pillowy dough melts in your mouth, and that cinnamon swirl? It’s pure bliss. I’ve served them at holidays and watched everyone fight over the last one—trust me, they’ll become a family favorite.
Impress Without the Stress: You might think Homemade Cinnamon Rolls are complicated, but this recipe simplifies everything with straightforward steps. No fancy equipment needed, just basic pantry staples. It’s rewarding to say, “I made these!” and see the smiles.
Customizable Sweetness: From classic to loaded with pecans, these Homemade Cinnamon Rolls adapt to your taste. The base recipe is forgiving, so experiment freely. What I find interesting is how a simple tweak elevates the whole experience.
Freshly Baked Aroma: Nothing beats the scent of Homemade Cinnamon Rolls rising—it’s therapeutic! This recipe yields about 12 rolls, perfect for sharing. Let’s be honest, baking them fresh makes any morning feel special.
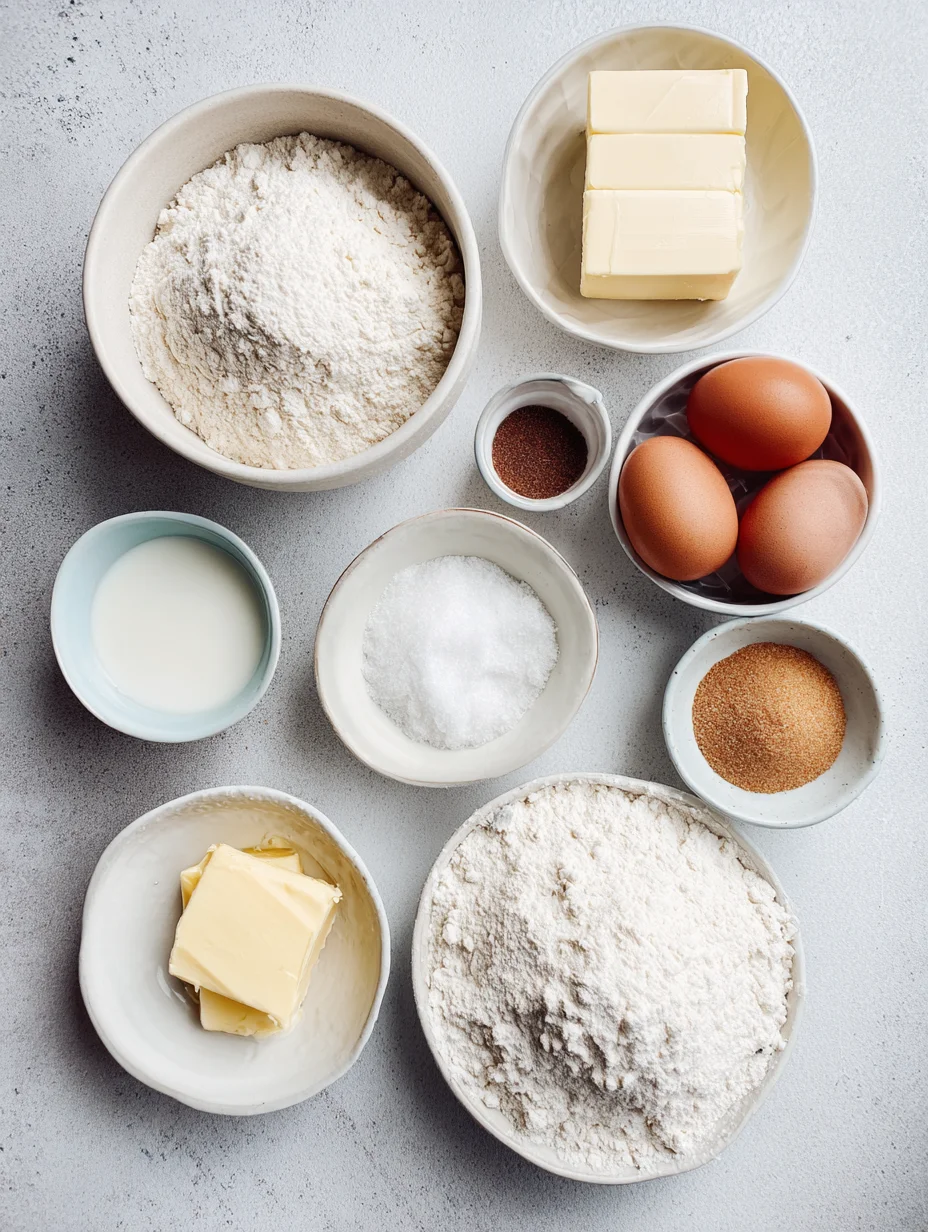
Essential Ingredients for Homemade Cinnamon Rolls
Active Dry Yeast: This is the magic that makes your dough rise to fluffy perfection. Without it, you’d end up with flat rolls, so measure it carefully—about 2 1/4 teaspoons for the batch. In my experience, proofing it in warm milk ensures it activates properly, setting the foundation for tender Homemade Cinnamon Rolls every time. It’s affordable and keeps well in the pantry.
Grab This Kitchen Scale Now — Best Precision Pick!

- Razor-Accurate Every Time: Dual-increment precision down to 0.1g — perfect for baking, meal prep, and portion control with g, oz, ml, and fl'oz modes.
- Smart Removable Bowl Design: Detachable bowl doubles as a protective case for compact storage. Tare function lets you weigh ingredients in any container with zero fuss.
- Built for Everyday Convenience: Auto-zero, tare function, low battery alert, overload indicator, and 2-minute auto-off to extend battery life — all in a sleek stainless steel build.
- ✓ "Perfect for baking — precise, lightweight, and stores easily without wasting counter space"
- ✓ "A game changer! Weighing ingredients is now way more accurate than measuring cups"
- ✓ "Love the 0.1g precision and backlight — best food scale I've owned. Highly recommend!"
⏰ Only a few items left in stock - order soon
Ground Cinnamon: The star of the filling, this spice brings that signature warm, sweet kick we all crave in Homemade Cinnamon Rolls. Use fresh, high-quality cinnamon for the best aroma; it intensifies as it bakes. About 2 tablespoons mixed with brown sugar creates the gooey swirl that defines these treats. Don’t skimp—it’s what elevates them from good to unforgettable.
Unsalted Butter: Softened for the dough and melted for the filling, butter adds richness and moisture to your Homemade Cinnamon Rolls. It helps the dough come together smoothly and carries the cinnamon flavor beautifully. I always use unsalted so I can control the salt level, preventing any overly savory notes. Room temperature butter is key for even mixing.
How to Make Homemade Cinnamon Rolls
Prepare the Dough
Start by warming your milk to about 110°F—too hot and it’ll kill the yeast, so test it with your finger. Dissolve the yeast and a teaspoon of sugar in it, letting it sit for 5-10 minutes until foamy; this proofing step is crucial for light, airy Homemade Cinnamon Rolls. In a large bowl, mix flour, remaining sugar, salt, and then incorporate the softened butter and egg. Knead for 8 minutes until smooth—I’ve found using a stand mixer saves time, but by hand works too, building those arm muscles along the way.
Fill and Shape the Rolls
After the dough rises for an hour in a greased bowl (cover with a damp cloth in a warm spot), punch it down and roll it out into a 16×12-inch rectangle on a floured surface. Spread melted butter generously, then sprinkle the brown sugar-cinnamon mixture evenly—inhale that scent; it’s heaven! Starting from the long side, tightly roll it up like a jelly roll, sealing the edge with a bit of water. This is where the magic happens for your Homemade Cinnamon Rolls, creating those perfect swirls.
Bake and Ice
Cut the log into 12 equal slices with a sharp knife or floss for clean edges, placing them cut-side up in a greased 9×13 baking dish. Let them rise another hour until puffy—the kitchen timer helps here. Bake at 350°F for 20-25 minutes until golden; watch closely to avoid overbrowning. While hot, slather on the cream cheese icing—beat softened cream cheese, butter, powdered sugar, vanilla, and milk until creamy. These Homemade Cinnamon Rolls are best served warm, pulling apart with that irresistible gooey center.
Ingredients
- 1 cup warm milk (110°F)
- 2 1/4 teaspoons active dry yeast
- 1/2 cup granulated sugar
- 1/3 cup unsalted butter, softened
- 1 large egg
- 4 cups all-purpose flour
- 1/2 teaspoon salt
- For filling: 1/3 cup unsalted butter, melted + 3/4 cup brown sugar + 2 tablespoons ground cinnamon
- For icing: 4 oz cream cheese, softened + 1/4 cup unsalted butter, softened + 1 1/2 cups powdered sugar + 1 teaspoon vanilla extract + 2-3 tablespoons milk
Homemade Cinnamon Rolls Instructions
- Warm milk and dissolve yeast with 1 tsp sugar; let sit 5-10 min until foamy.
- Mix in sugar, butter, egg, flour, and salt; knead 8 min until smooth. Let rise 1 hour.
- Roll dough to 16×12 rectangle; spread butter, sprinkle cinnamon-sugar. Roll tightly, cut into 12.
- Place in greased dish; rise 1 hour. Bake 350°F for 20-25 min.
- Prepare icing: beat cream cheese, butter, sugar, vanilla, milk. Frost warm rolls.
Pro Tips for the Best Homemade Cinnamon Rolls
Yeast Check: Always proof your yeast first—if it doesn’t bubble, it’s dead and your rolls won’t rise properly.
Room Temp Everything: Use ingredients at room temperature for even mixing and better texture in the dough.
Dental Floss Trick: Slice the log with unflavored floss to avoid squishing the swirls.
You Must Know
- These Homemade Cinnamon Rolls require two rises for maximum fluffiness—don’t rush it.
- Total time is about 3 hours, but hands-on is only 45 minutes.
- The recipe scales easily; double for a crowd.
- Freshly ground cinnamon enhances the flavor profile significantly.
How to Store Homemade Cinnamon Rolls
To keep your Homemade Cinnamon Rolls fresh, cool them completely before covering with plastic wrap or foil in an airtight container—they’ll last 2-3 days at room temp. For longer storage, refrigerate up to a week, though the icing might firm up. Reheat in the microwave for 15-20 seconds or oven at 300°F for 5 minutes to restore that soft, gooey texture. Freezing unbaked rolls lets you bake fresh anytime—just thaw and rise before baking.
Customizing Your Homemade Cinnamon Rolls
Feel free to swap all-purpose flour for half whole wheat for a heartier version, or add chopped pecans to the filling for crunch. If you’re vegan, use plant-based milk, butter, and egg replacer—these tweaks keep the Homemade Cinnamon Rolls deliciously moist. For a citrus twist, stir orange zest into the icing. Check out our healthy peanut butter banana muffins recipe for more breakfast inspiration that pairs well with variations.
What to Serve with Homemade Cinnamon Rolls
These rolls shine alongside a fresh fruit salad or yogurt parfait for a balanced brunch. Pair them with our 5-minute lemon parmesan lettuce salad to cut the sweetness with tangy greens. For heartier options, try breakfast sausage casserole or fluffy eggs. A hot coffee or iced latte complements the cinnamon notes perfectly—simple yet satisfying.

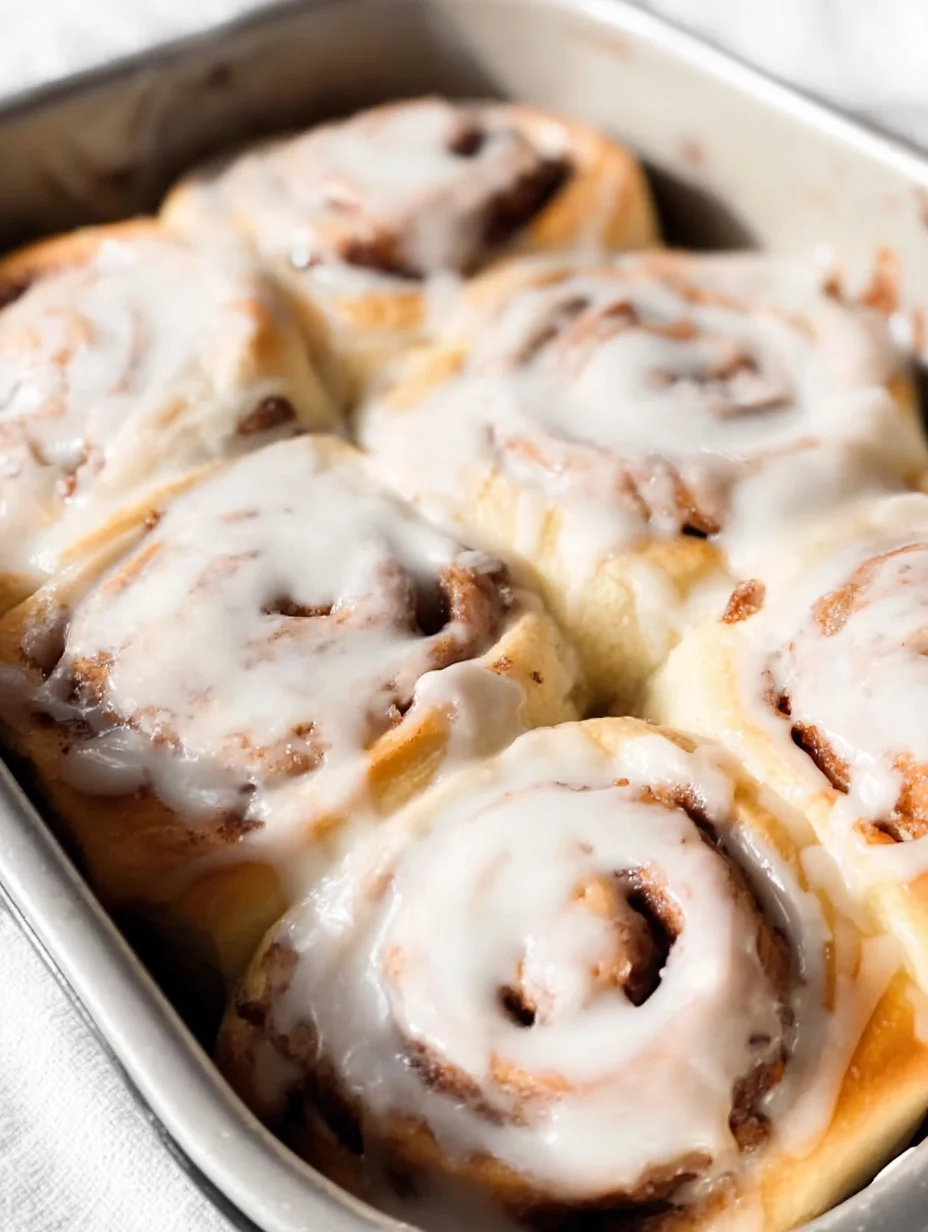
BEST Homemade Cinnamon Rolls
These are the absolute BEST cinnamon rolls ever!! With a pillowy soft homemade dough, sweet cinnamon filling, and ooey gooey cream cheese frosting, there's no better treat!
Timing
Recipe Details
Ingredients
- 01 4-5 cups all-purpose flour (spooned and leveled (520g-650g))
- 02 1/4 cup granulated sugar ((50g))
- 03 2 1/4 teaspoons instant yeast ((1 package))
- 04 1/2 teaspoon salt
- 05 3/4 cup water ((180mL)*)
- 06 1/2 cup whole milk ((120mL))
- 07 1/4 cup unsalted butter (cut into 4 slices (60g))
- 08 1 large egg (at room temperature)
- 09 6 tablespoons unsalted butter (very soft (85g))
- 10 3/4 cup packed brown sugar (light or dark (150g))
- 11 1 1/2 tablespoons ground cinnamon
- 12 4 oz full fat block cream cheese (room temperature (115g))
- 13 5 tablespoons unsalted butter (room temperature (70g))
- 14 1 1/2 cups powdered sugar ((195g))
- 15 1 teaspoon pure vanilla extract
Instructions
In a large bowl, combine 3 cups of flour (to start), sugar, yeast, and salt. Whisk to combine and set aside.
In a medium microwave safe bowl or cup, combine water, milk, and sliced butter. Microwave in 10 second bursts until the butter just melts and the mixture feels warm but not hot. You can also do this with a pot placed on a stove burner set to low heat.
Whisk the egg into the water mixture to combine.
Pour the wet ingredients over the flour mixture. Using a wooden spoon, mix together until you have a very thick and sticky dough.
Add another 1 cup of flour to the dough and mix until it starts coming together into ball.
This next step can be done directly in your bowl or on a lightly floured work surface. Knead the dough, adding flour as needed to keep it from sticking to your hands / the sides of the bowl, until it's smooth, elastic, and slightly tacky. If you poke the top of the dough, it should spring back - if the indent remains, the dough needs more kneading.
Cover the dough and set aside for about 20 minutes. The dough will puff up slightly but won't double in size. This is just to relax the gluten and make the dough easier to roll without it pulling in on itself.
Turn the rested dough onto a lightly floured work surface and roll it out into a roughly 14x10 inch rectangle. Use your hands to press and pull the edges to get as nice of a rectangular shape as you can - it doesn't have to be perfect though!
Spread the softened butter over the dough, leaving a roughly 1/2 inch boarder along the edges. Sprinkle the sugar on top and use your hands to spread it out into an even layer over the butter. Finally, sprinkle the cinnamon evenly on top.
Working from the longer side of the dough, roll it up into a log.
Cut about 1/2 an inch off each end of the log (this just makes for nicer and more uniform rolls - you can bake them off separately or just skip this step if you don't mind the appearance).
Use a sharp serrated knife or unflavored dental floss to cut the log into 12 even rolls. If using a knife, cut the rolls using a sawing motion to prevent squishing. If using floss, break off a large string of unflavored dental floss and wiggle it under your log of dough positioned where you'd like to cut. Lift the ends of the floss up and over the log and cross to form an X. Pull on the ends of the floss to cut through the dough (see above post for visual).
Arrange the rolls cut side up in a 9x13 inch baking dish. There should be a tiny bit of space between each roll but it's fine if they're touching.
Cover the rolls and set aside in a warm place for about 45 minutes or until about doubled in size. My favorite place to keep cinnamon rolls during this time is in the oven (it shouldn't be on or hot) just because it keeps the rolls safe from any cold drafts. They'll be pressed up against each other once they puff up - that's normal!
Uncover the rolls and place into the center of your preheated oven. Bake for 25 to 30 minutes or until a nice golden brown on top. Set aside while you make the icing.
In a medium sized bowl, combine icing ingredients. Using an electric mixer fitted with the paddle attachment or a wooden spoon by hand, cream together until smooth. If using a mixer, start on low speed just to incorporate everything together and then whip on medium speed to smoothen the mixture out.
While the cinnamon rolls are still warm, spread the icing on top. It'll melt slightly and make them extra gooey!
FILED UNDER:
NUTRITION FACTS (PER SERVING)
Nutrition information is calculated using an ingredient database and should be considered an estimate. In cases where multiple ingredient alternatives are given, the first listed is calculated for nutrition. Garnishes and optional ingredients are not included.
Frequently Asked Questions About Homemade Cinnamon Rolls
Can I make Homemade Cinnamon Rolls ahead of time?
Absolutely, prepare the rolls up to the second rise and refrigerate overnight—bake in the morning for fresh warmth. This method works great for holidays. Just add 20-30 minutes extra rising time if needed.
How long does Homemade Cinnamon Rolls last in the fridge?
Your rolls stay fresh for up to 5 days when stored airtight; the icing keeps them moist. Beyond that, freeze slices individually. Reheat gently to avoid drying out.
Can I use instant yeast for Homemade Cinnamon Rolls?
Yes, instant yeast skips the proofing step—just mix it directly with dry ingredients. Reduce to 1 3/4 teaspoons and expect the same fluffy results. It’s a time-saver I love using.
Why are my Homemade Cinnamon Rolls dense?
Density often comes from under-kneading or old yeast—ensure 8 full minutes of kneading and fresh ingredients. Over-flouring the surface can toughen them too. In my experience, measuring flour by weight helps precision.
Are Homemade Cinnamon Rolls gluten-free possible?
Swap in a 1:1 gluten-free flour blend, but add xanthan gum if not included for binding. The texture will be slightly denser, but still tasty. Test with a small batch first.
What’s the best icing for Homemade Cinnamon Rolls?
Cream cheese icing is classic for its tangy contrast to the sweet rolls, but vanilla glaze works for lighter flavor. These Homemade Cinnamon Rolls pair best with creamy toppings—beat until silky smooth. Experiment to find your fave.
Can I add fruit to Homemade Cinnamon Rolls?
Sure, fold in diced apples or raisins to the filling for moisture and chew. Avoid wet fruits to prevent soggy dough. It adds a fun twist I enjoy in fall.
How do I know when Homemade Cinnamon Rolls are done baking?
Look for golden tops and a hollow sound when tapped—the internal temp should hit 190°F. Overbaking dries them out, so start checking at 20 minutes. Cool slightly before icing for perfect pull-apart texture.
Final Thoughts
From that first yeast proof to the final icing drizzle, making Homemade Cinnamon Rolls is a labor of love that pays off in every sticky, delicious bite. I’ve shared this recipe with friends, and it’s always a hit—warm, comforting, and utterly addictive. Grab your apron and give it a try; your home will thank you with those heavenly scents. Share your results in the comments—I’d love to hear how your batch turned out!